As part of ongoing cybersecurity initiatives, Microsoft is starting to roll out multi-factor authentication (MFA, also called 2-factor/2FA) for all customers. We understand this can be frustrating, but 99% of successful hacks are against accounts that do NOT have 2FA set up.
Sometime in the next month, you will start seeing a screen like this when you log in to either Microsoft 365 or Google:

You can click "Skip for now" for up to 14 days, but we recommend you do it as soon as possible to avoid being forced into it at an (inevitably) inconvenient time.
Before you begin, make sure you are signing into your account on a desktop/laptop so your mobile device is free to set up the Microsoft Authenticator app.
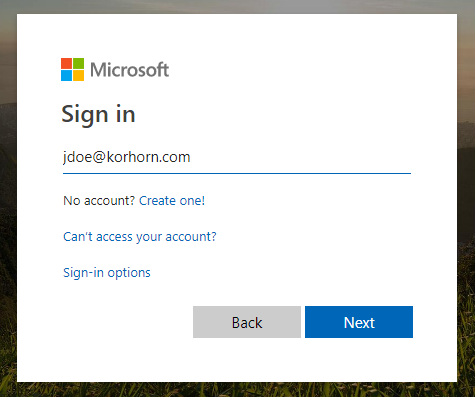
To start the setup process, go to https://aka.ms/MFASetup on your computer (skip down to #4 if you are there already), and log in with your company email address and password:

The next screen will say “More information required”; click Next.

You will be prompted to download and install the Microsoft Authenticator app on your mobile device - you do not have to install this if you already have another app (typically Google's authenticator) that you prefer. in this case, "I want to use a different authenticator app", and follow your app's instructions for adding a new account.

If you already have the Microsoft Authenticator app: On your phone, click on the + in the home menu of the app, then skip to step 7.
If you need to download the Microsoft Authenticator app: go to your mobile device's App Store and search "Microsoft Authenticator". You should see the app with the icon as in the image above. Download and install that app (or scan one of the QR codes below):
Download Microsoft Authenticator link Apple iOS Devices:
Download Microsoft Authenticator for Android Devices:
Once downloaded, open the app (and allow notifications if prompted). Agree and accept the terms of service and other pop-ups until you see the menu in the image below. On this menu tap "Scan a QR Code"; your camera should open - if it asks you to allow the camera please do so.

Back on your computer, click Next and a QR code should appear similar to the screen below. Scan this QR Code with your phone. YOU MUST SCAN THIS QR code from inside your Microsoft Authenticator App NOT the QR/Camera app on your phone!

Once scanned, you should see your account on the main page.
On your computer, click Next and a number should pop up.
On your phone, a notification should appear saying "Are you trying to sign in?"

Enter the number from your computer into the notification on your phone and tap "Yes"
If after entering the number you are prompted for a PIN/password, this is your device PIN/password
On your computer, you should see a "Notification approved" message, click Next
You are all set!
Your Microsoft Authenticator app should open automatically as needed in the future. If you're prompted for a 6-digit code for some reason, open the app manually, tap your account on the main menu and you should see the 6-digit code that you are being asked for.
Note: If you prefer the traditional (but somewhat less secure) method of entering a code from a text message, then once you get the authenticator app installed and set up, you can go to https://mysignins.microsoft.com/security-info and add SMS as a 2-factor method.
Note 2: If you don't wish to use your personal mobile device at all for accessing your work account, we recommend using a free password manager extension in Chrome like BitWarden: https://chrome.google.com/webstore/detail/bitwarden-free-password-m/nngceckbapebfimnlniiiahkandclblb
More Info: If you want more detailed information from Microsoft on how/why they're rolling this out: https://azure.microsoft.com/en-us/blog/announcing-mandatory-multi-factor-authentication-for-azure-sign-in/
